Good to Know
Important!
Create an account on the site to access the downloads.
The account can also be created automatically on the checkout page.
Thank you.
In the case of a complete order, please check your inbox to see if you have received a confirmation email; if not, check your email account’s spam.
If your email was received in the spam section, we recommend moving it to the inbox. This way, you will be sure to receive the following emails from the Xanndora.com website.
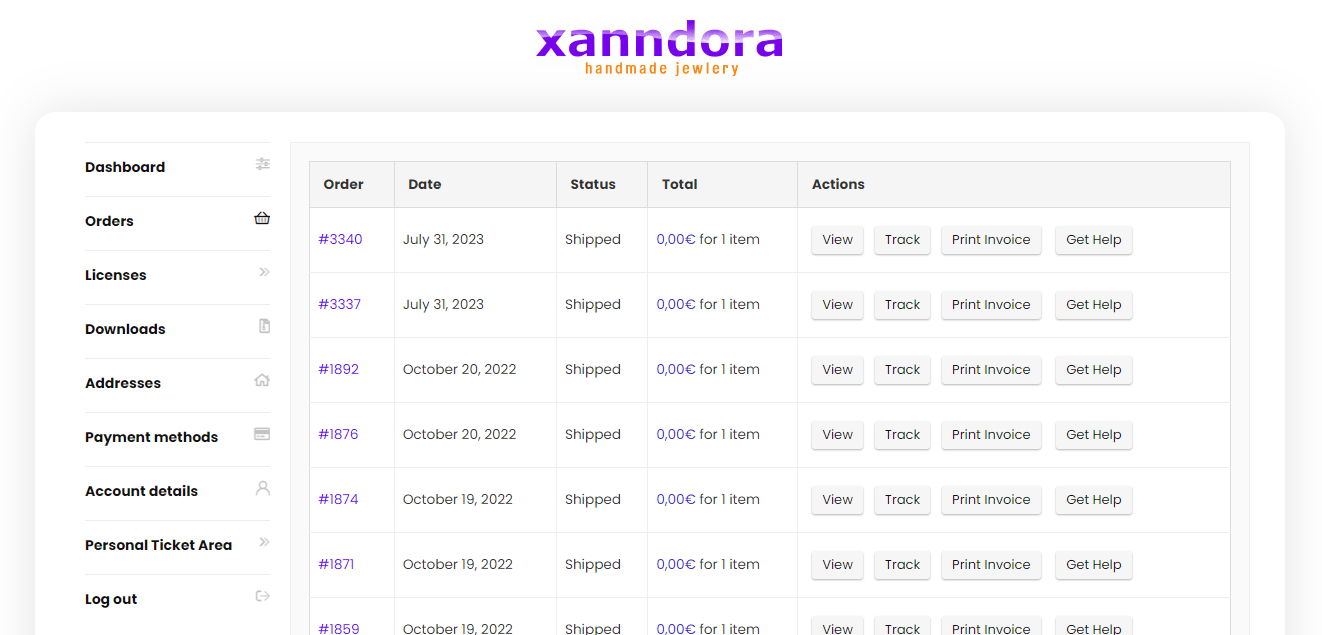
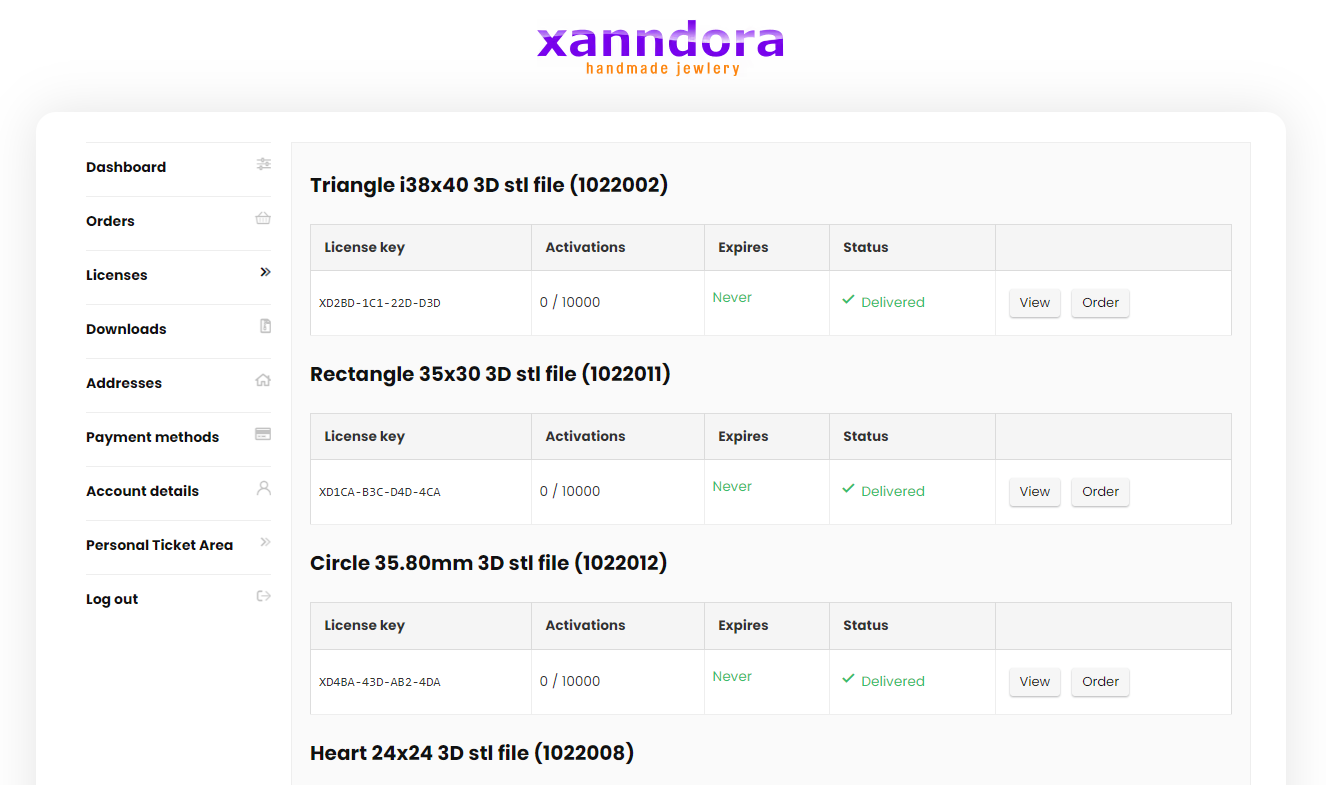
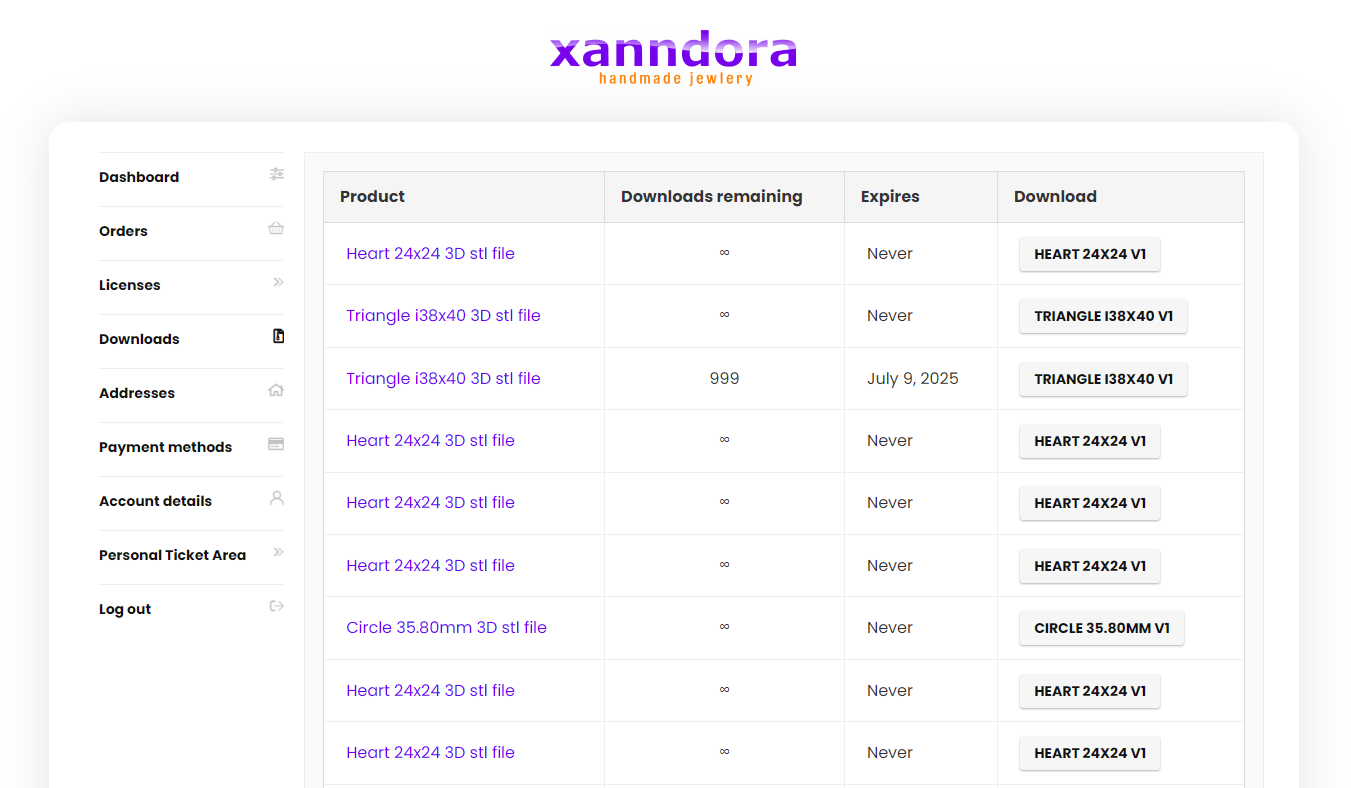
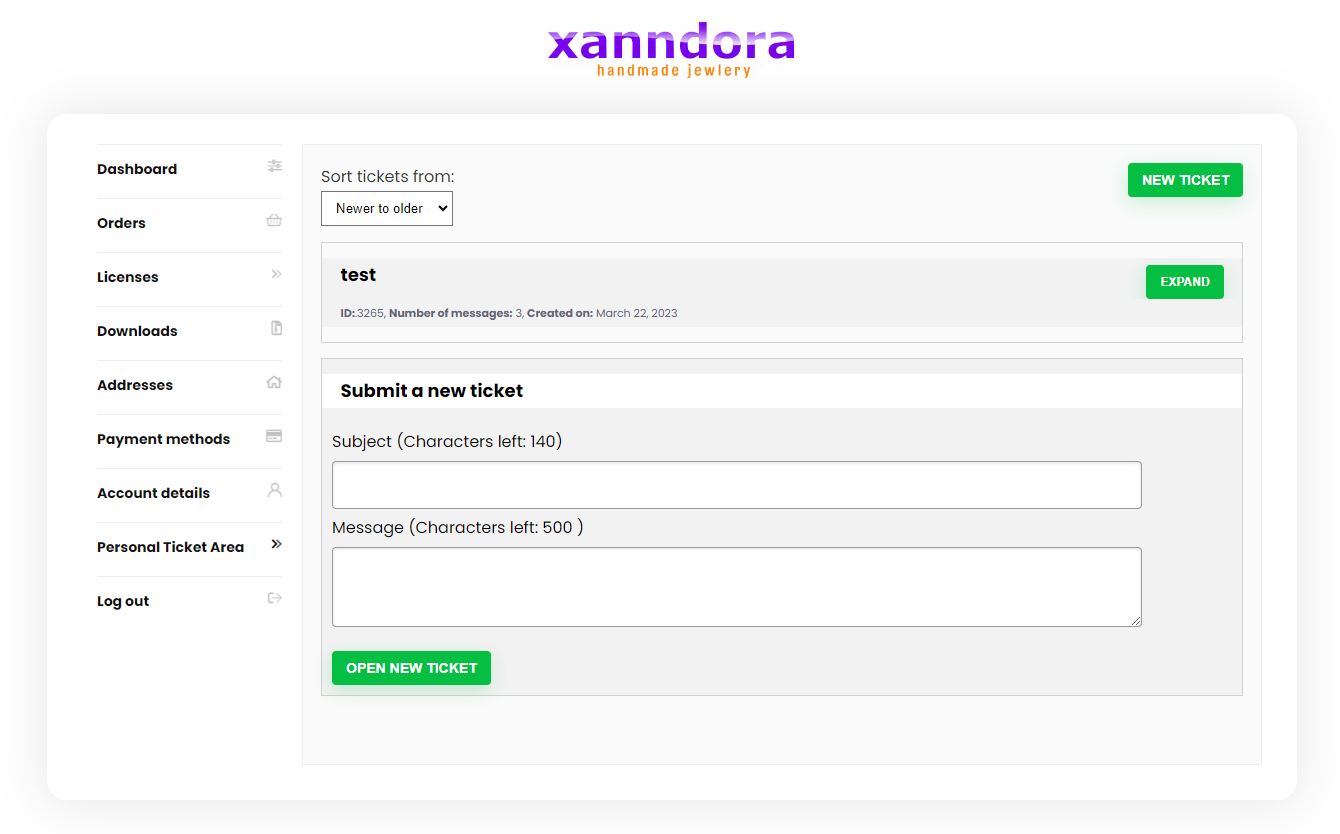
Regardless of whether or not you receive an email after placing the order, in the dashboard of your account on the xanndora.com website, you have everything: invoice, license, downloads, etc., as in the images below: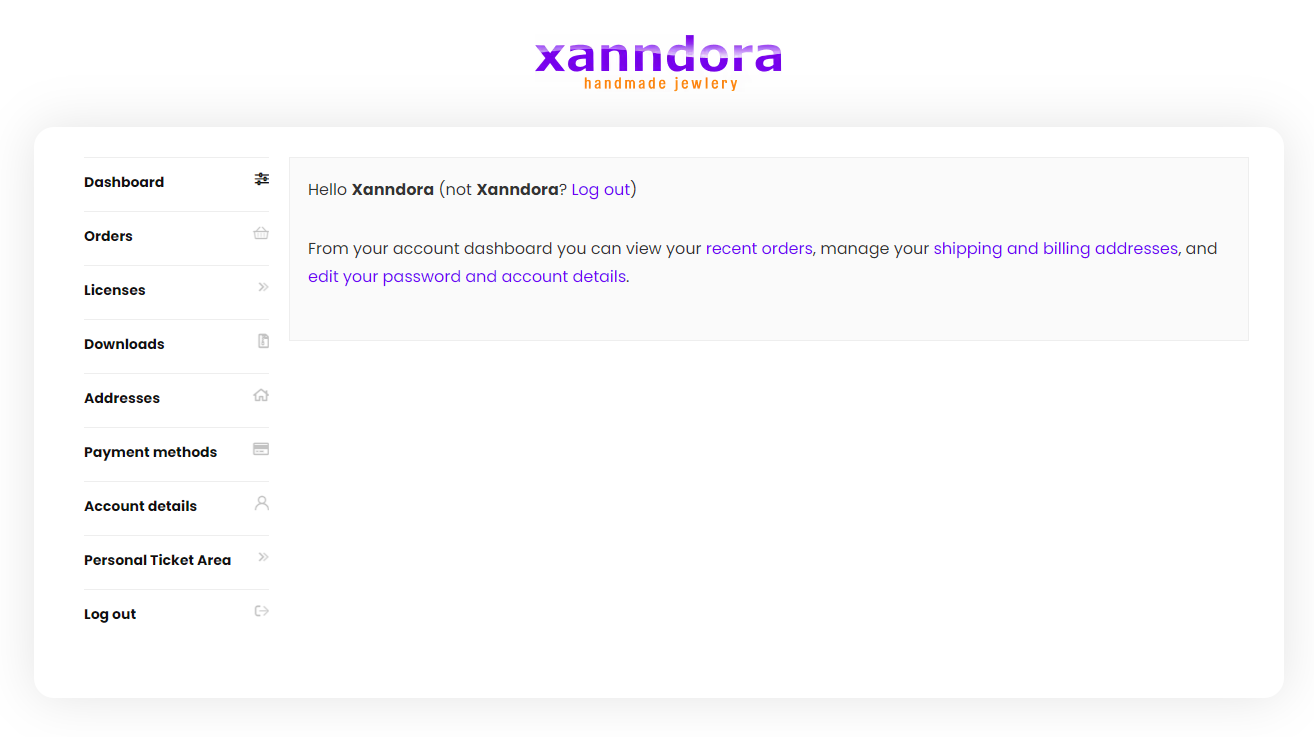
Regular License
All files are for personal use only and cannot be used commercially or be resold/redistributed.
Designs are copyrighted to You and can only be printed for personal use.
Mass printing for resale is not allowed.
You have the right to download the file only once within 7 days from the order date, so please save it and keep it carefully. The file is accompanied by the Regular License (in the buyer’s name). You do not have the right to redistribute, resell, or share it.
——————————
Extended License
Use, by you or one client, in an end product for which end clients can be charged.
All files can be used commercially or be resold/redistributed.
Designs are copyrighted to You and can be printed for commercial use.
Mass printing for resale is allowed.
Note:
You may charge your client for your services to create an end product, even under the Regular License. However, you can use only one regular license for a single client.
Free and paid STL files can differ in several ways, primarily based on the level of quality, complexity, usage rights, and support. Here are some potential differences:
- Quality and Detail:
- Free: Free STL files might have varying levels of quality. Some may be well-designed and detailed, while others lack intricate details or refinement.
- Paid: Paid STL files are often expected to have higher quality and better detailing. Creators might invest more time in refining the design, ensuring accuracy, and adding intricate features.
- Complexity:
- Free: Free STL files could range from simple designs to moderately complex ones. Highly complex designs might be less common among free options.
- Paid: Paid STL files might include more complex and intricate designs that require advanced skills and techniques.
- Usage Rights:
- Free: Free STL files might come with different usage rights, which can vary from file to file. Some creators might allow free files to be used for personal and commercial purposes, while others might restrict usage.
- Paid: Paid STL files typically come with clearer usage terms. Purchasing a file might grant you more rights, especially for commercial use.
- Support and Updates:
- Free: Free STL files might not have dedicated support or regular updates. If you encounter issues, you might need to rely on online communities or forums for help.
- Paid: Purchasing a paid STL file might include support from the creator. They might offer assistance for any problems you encounter and could provide updates or improvements to the design over time.
- Customization and Variations:
- Free: Free STL files might have limited customization options or variations. If you need specific modifications, you might need to work with the original file or find alternate versions.
- Paid: Paid STL files might offer customization options or variations as part of the purchase, allowing you to tailor the design to your needs.
- Licensing and Redistribution:
- Free: Free STL files might come with open licenses, allowing you to modify and redistribute the design. However, this isn’t always the case, so you should always check the license terms.
- Paid: Paid STL files might have more restrictive licensing terms, especially if the creator wants to control how the design is used and distributed.
- Time and Effort Invested:
- Free: Creators of free STL files might have invested varying time and effort into their designs, depending on their motivations.
- Paid: Creators of paid STL files are often motivated by compensation. The financial incentive might make them more inclined to invest significant time and effort into creating high-quality designs.
It’s important to note that these differences aren’t absolute, and there can be exceptions in both the free and paid categories. When choosing between free and paid STL files, it’s a good practice to review the details, such as usage rights, licensing, and support, to ensure that you’re getting what you need for your specific project.
Jewelry Maintenance
- wipe your jewelry with a clean, soft cloth.
- take it off when bathing and going to bed, and keep it carefully to avoid scratches.
- avoid chemicals, cosmetics, alcohol, acid, alkali, etc.
- do not wear in the water.
- may break if dropped or bent.
- do not expose your jewelry to strong sunlight or high temperatures.
Returns & Exchanges
Accepted – 14 days from the date of receipt
Please do not return any item without our approval. If we agree on an exchange or a return, buyers are responsible for all the shipping costs.
There may be some situations where we do agree with a return or an exchange, so please contact us if you think you need to return/exchange the item.
You have 14 days from the date of receipt to ship this item back to us.
More details on Return and Refund Policy.
The polymer clay cutters PLA can be used for cookies?
Polymer clay cutters made from PLA (polylactic acid) are primarily designed for use with clay and may not be food-safe. However, if you are considering using them for cookies or any other edible items, keep the following points in mind:
- Food Safety: Not all PLA is food-safe. While some food-safe PLA variants are available, the typical PLA used for 3D printing may contain additives or be processed in ways that aren’t safe for food. It’s important to ensure that the PLA used is specifically marked as food-safe.
- Cleanliness: If a cutter has been used on polymer clay, it should not be used on food afterward. Polymer clay is not food-safe, and residues or particles can contaminate the food.
- Durability: PLA might not hold up well to repeated exposure to moisture and can warp under high heat. Cleaning PLA items in a dishwasher, for example, could deform them.
- Surface Smoothness: 3D printed items can have tiny ridges and grooves where bacteria can hide, making them harder to clean thoroughly than commercially produced cookie cutters.
If you wish to use PLA cutters for cookies, it’s best to:
- Ensure the PLA used is food-safe.
- Dedicate those cutters solely for food use and not mix them with crafting tools.
- Clean them thoroughly by hand washing.
- Store them in a dry place to ensure longevity.
Always prioritize safety when it comes to anything that comes in contact with food.
Polymer Clay Cutters Maintenance
Maintaining polymer clay cutters is essential to ensure their longevity and ensure clean cuts every time you use them. Here are steps and tips to care for your polymer clay cutters:
- Cleaning After Each Use:
- Remove clay residues immediately after use.
- A damp cloth should suffice for plastic or acrylic cutters. Avoid using hot water, as it may warp or deform the cutter.
- Storing Properly:
- Use a container or pouch to store your cutters. This not only keeps them organized but also protects them from dust and dirt.
- Store them in a cool, dry place away from direct sunlight.
- Avoid Using Damaged Cutters:
- If a cutter has any cracks, it’s best to replace it. A cracked cutter might break during use, leading to uneven cuts or potential injury.
- Avoid Exposure to Excessive Heat:
- If your cutters are made of plastic or certain metals, they might deform when exposed to high heat. Keep them away from heaters, ovens, or direct sunlight for prolonged periods.
By regularly checking and maintaining your polymer clay cutters, you can ensure they remain in top condition and continue to provide precise, clean cuts for your projects.
How are the polymer clay cutters PLA used for making jewelry?
Polymer clay cutters made of PLA (often through 3D printing) can be instrumental in jewelry-making processes. Here’s how they’re typically used:
- Design Selection:
- Choose the cutter design that fits the jewelry piece you intend to make. This could be anything from basic geometric shapes for earrings to intricate designs for pendants.
- Conditioning the Clay:
- Before you begin, the polymer clay needs to be conditioned, which makes it pliable and easy to work with. You can do this by kneading the clay with your hands or using a pasta machine until it’s soft and flexible.
- Using the Cutter:
- Flatten your conditioned clay to the desired thickness using rollers or a pasta machine.
- Press the PLA cutter firmly into the flattened clay. Ensure you apply even pressure so that the cut goes through the clay.
- Remove the excess clay around the cutter to reveal the shape.
- Carefully extract the clay from the cutter. Since polymer clay can be sticky, it may be helpful to wrap it in cellophane before pressing it to make the removal process easier.
- Adding Details:
- Once the basic shape is cut, you can add more details using tools or smaller cutters if necessary.
- Baking:
- After creating your design, the polymer clay pieces must be baked to harden. Follow the manufacturer’s guidelines for baking temperatures and times.
- Remember: Do not bake your PLA cutters, as PLA has a low melting point and can deform easily with heat.
- Finishing Touches:
- After baking and cooling, you can sand the edges for a smoother finish, paint the clay, or add glazes for a glossy look.
- Finally, the necessary hardware, such as earring hooks, chains, or jump rings, is attached to turn the clay piece into wearable jewelry.
- Storing the Cutters:
- Clean the PLA cutters after use to ensure no clay residue remains. Store them in a cool, dry place away from direct sunlight to prevent any warping or deformation.
By using PLA polymer clay cutters, jewelry makers can achieve consistent shapes and designs, allowing for a more professional look and the ability to produce multiple items with the same design.
How do we use the STL files to make polymer Clay Cutters?
STL (stereolithography) files are widely used in 3D printing. If you want to make polymer clay cutters using STL files, you’ll be essentially 3D printing them. Here’s a step-by-step guide:
- Design or Obtain the STL File:
- If you’re a designer, you can design your cutter using software like Tinkercad, Blender, Fusion 360, or other CAD software.
- If you’re not a designer, you can purchase or find free STL files for clay cutters online. Ensure the design suits your needs and doesn’t infringe on copyrights.
- Prepare the STL File for Printing:
- Import the STL file into slicing software compatible with your 3D printer. This software will convert the 3D model into layers and generate the G-code that guides the printer.
- Adjust print settings:
- Material: Use PLA or another appropriate filament. Some might prefer food-safe PETG, especially if the cutter might come into contact with food.
- Infill: Choose an infill percentage. For a cutter, something like 20% should be sufficient.
- Supports: Depending on the design, you may or may not need support.
- Layer height: A smaller layer height, like 0.1mm, will give a smoother finish, but it will take longer to print.
- 3D Printing the Cutter:
- Load the filament into your 3D printer.
- Start the print and monitor the first few layers to ensure proper adhesion to the print bed.
- Let the printer run until the cutter is complete.
- Post-Processing:
- Once the print is done, carefully remove the cutter from the print bed.
- Remove any supports if they were used.
- You can sand the edges of the cutter to ensure they’re smooth and will give clean cuts on clay.
- Using the Cutter with Polymer Clay:
- Condition and flatten your polymer clay.
- Press the 3D-printed cutter into the clay to cut out the desired shape.
- Bake the clay as per the manufacturer’s instructions.
- Maintenance:
- Clean the cutter after each use to ensure there’s no residual clay. Store in a cool, dry place.
Remember, while PLA is a popular material for 3D printing, it can be sensitive to heat. Don’t leave your cutters in a hot environment, as they can deform. If you’re considering making cutters that will be used for both clay and food, you might want to consider using a food-safe filament and ensuring the entire printing process remains food-safe.
What can be made of polymer clay?
Polymer clay is a versatile, oven-bake modeling material that hardens when baked. Crafters, artists, and hobbyists favor it for many projects due to its ease of use and ability to hold intricate details. Here are some of the many items that can be made with polymer clay:
- Jewelry:
- Earrings, necklaces, pendants, rings, and bracelets
- Brooches and pins
- Beads for jewelry-making
- Miniatures:
- Dollhouse items (furniture, food, dishes, etc.)
- Figurines and sculptures
- Model scenes and landscapes
- Home Decor:
- Decorative bowls, vases, and dishes (though not recommended for food use)
- Wall art and hanging ornaments
- Picture frames and mirrors with decorative borders
- Accessories:
- Buttons for clothing or crafting
- Hairpins, barrettes, and other hair accessories
- Keychains and bag charms
- Toys and Games:
- Custom action figures or dolls
- Board game pieces or tokens
- Puzzle pieces
- Art:
- Canvases with 3D polymer clay elements
- Relief sculptures and murals
- Functional Items:
- Pens or pencils with decorative handles
- Stamps for crafting (though these might be more ephemeral depending on use)
- Business card holders or small trays
- Special Occasion Crafts:
- Customized cake toppers (for decoration only, not for consumption)
- Holiday ornaments or decorations
- Personalized gifts
- Mixed Media Projects:
- Incorporating polymer clay elements into paintings, collages, or scrapbooks
- Combining with wire, glass, or other materials to create intricate designs
- Educational Tools:
- Anatomical models
- Geographical or historical dioramas
- Custom tokens or teaching aids
- Coverings:
- Covering objects like glass jars, switch plates, or boxes to give them a new, decorative look.
- Technique Demonstrations:
- Millefiori, or “caning,” is a process in which intricate patterns are created within a log of clay and then sliced to reveal the design.
- Skinning blend or gradient techniques.
- Surface treatments using mica powders, inks, paints, and more.
Because of its malleability and wide color range, polymer clay provides almost limitless possibilities for creativity. However, it’s crucial to remember that items made from polymer clay should not be used for food or drink, even after baking, as they aren’t food-safe.
3D printers use a variety of materials, each with its own unique characteristics, to create objects. The choice of material depends on the specific application, the desired properties of the final object, and the capabilities of the 3D printer itself. Here are some common 3D printing materials and their characteristics:
- PLA (Polylactic Acid):
- Characteristics: PLA is a biodegradable thermoplastic derived from renewable resources like cornstarch or sugarcane. It’s easy to print with, has a relatively low melting point, and produces minimal warping.
- Advantages: Environmentally friendly, low odor, suitable for general-purpose printing, comes in various colors.
- Limitations: It is unsuitable for high-temperature applications and can become brittle over time.
- ABS (Acrylonitrile Butadiene Styrene):
- Characteristics: ABS is a durable and impact-resistant thermoplastic. Its higher melting point compared to PLA makes it more suitable for functional parts.
- Advantages: Strong, durable, good for mechanical parts, can be post-processed (sanded, painted).
- Limitations: Prone to warping and emitting fumes during printing, requires a heated print bed.
- PETG (Polyethylene Terephthalate Glycol):
- Characteristics: PETG is a tough and versatile material with good impact resistance. It combines some properties of PLA and ABS, being easy to print like PLA while offering durability like ABS.
- Advantages: Strong, flexible, good layer adhesion, less prone to warping, food-safe when printed properly.
- Limitations: Can be more challenging to achieve fine details compared to PLA.
- TPU (Thermoplastic Polyurethane):
- Characteristics: TPU is a flexible and elastic material, making it suitable for producing objects requiring rubber-like properties.
- Advantages: Flexible, elastic, good for producing gaskets, phone cases, footwear, etc.
- Limitations: It can be challenging to print due to its flexible nature and might require specialized extruders.
- Nylon:
- Characteristics: Nylon is a strong and durable material with good impact resistance. It has a high melting point and can be used for functional parts that require mechanical strength.
- Advantages: Strong, durable, good chemical resistance, suitable for functional prototypes and end-use parts.
- Limitations: Can absorb moisture from the air, requiring proper storage and drying before printing.
- PC (Polycarbonate):
- Characteristics: PC is known for its high impact resistance and excellent optical clarity. It’s suitable for producing transparent or impact-resistant parts.
- Advantages: Strong, high-temperature resistance, transparent when printed thinly, impact-resistant.
- Limitations: It requires high print temperatures and a heated bed, which can be challenging to print due to warping.
- Metal and Metal Alloys:
- Characteristics: Metal 3D printing involves using metal powders, which are sintered or melted using various techniques (e.g., powder bed fusion, direct energy deposition). Different metals offer various mechanical, thermal, and electrical properties.
- Advantages: Suitable for creating functional metal parts, can achieve intricate designs, various metal options available.
- Limitations: It requires specialized and expensive equipment, is limited to certain metals, and may need post-processing.
- Resin (Stereolithography, SLA/DLP):
- Characteristics: Resin-based 3D printing produces highly detailed objects with smooth surfaces using liquid photopolymer resins that cure when exposed to UV light.
- Advantages: High level of detail, smooth surface finish, suitable for intricate models, jewelry, dental applications, etc.
- Limitations: Limited color options, post-processing (curing and cleaning) is required, and resin can be toxic and messy to work with.
These are just a few examples of the many materials used in 3D printing. The right material choice depends on intended use, mechanical properties, temperature resistance, flexibility, etc. Always ensure that the chosen material is compatible with your 3D printer and suits your specific project requirements.
The optimal settings for 3D printing with PLA can vary between different models and brands of 3D printers. However, I can provide you with a general guideline of settings that are commonly used for PLA printing on popular 3D printers. Remember that these settings can serve as a starting point, and you may need to adjust them based on your specific printer and the results you’re getting.
Layer Height:
- Start with a layer height of around 0.2mm for standard-quality prints. You can go lower for finer details or higher for faster prints.
Extruder Temperature:
- PLA typically prints well at temperatures ranging from 190°C to 220°C. Start at around 200°C and adjust in 5°C increments if needed.
Bed Temperature:
- PLA usually adheres well to a heated bed with a temperature of around 50°C. Some printers might not require a heated bed for PLA.
Print Speed:
- A reasonable starting point for print speed is around 50mm/s. You can adjust this based on the intricacy of your model and the quality you’re aiming for.
Infill Density:
- For most models, an infill density of 20% to 30% provides a good balance between strength and material usage.
Perimeters/Wall Count:
- Start with 2 or 3 perimeters (shells) for standard quality. Increase this for thicker walls or finer detail.
Retraction Settings:
- PLA generally requires less retraction than more flexible filaments. Start with a retraction distance of around 6mm and adjust as needed. The retraction speed can be around 40mm/s.
Cooling Fan:
- PLA benefits from active cooling. Turn on the cooling fan at a low speed (around 50%) for the first few layers and gradually increase it to full speed.
Bridging Settings:
- PLA can bridge relatively well. Start with bridge settings that match your general print settings, and adjust if you notice sagging or drooping on bridges.
Adhesion:
- PLA usually adheres well to clean glass or heated beds with a thin layer of adhesive (e.g., glue stick, hairspray). If you experience warping, try using a brim or a raft.
Remember that these settings can vary based on your printer’s design, the specific brand and type of PLA filament you’re using, and the model you’re printing. Always perform test prints and make incremental adjustments to find the best settings for your specific setup. It’s also a good practice to consult your printer’s manual or online community forums for recommendations tailored to your equipment.
Here are some of the color trends for jewelry making in 2023:
The 2023 jewelry trends are rising for standout earrings, rings, and necklaces that reflect shoppers’ personalities and interests. The shift toward using jewelry for a truly personal statement has been a long time coming. During the past two years with the pandemic, everyone needed colorful, uplifting, and fun jewelry as a way to boost their moods. That bright and whimsical aesthetic will continue in 2023, with chunky cuffs and eye-catching earrings also trending upward. Those candy-colored necklaces are a perfect encapsulation of how jewelry this summer is delivering cheeky whimsy.
- Vivid colors: Bold and bright colors will be big in jewelry this year. Think magenta, fuchsia, emerald green, and cobalt blue. These colors are perfect for adding a pop of excitement to your outfit.
- Pastel colors: Pastels also have a moment in the jewelry world. These soft and muted colors create a more romantic or feminine look.
- Multicolored jewelry: Mixing and matching different colors is another trend to watch for in 2023. This could mean stacking bangles in different colors or wearing a necklace with beads in various hues.
- Enamel jewelry: Enamel is a versatile material that can be used to create jewelry in various colors. This makes it a great choice for those who want to add a pop of color to their look without going overboard.
- Gemstones: Colored gemstones are also trending in jewelry this year. Emeralds, sapphires, and rubies are all popular choices, but you can also find jewelry with more unique stones, like opals and garnets.
So, bright and colorful jewelry seems to be in trend for 2023! 😊
No matter what your style, there’s a color trend for jewelry making in 2023 that’s perfect for you. So get creative and have fun experimenting with different colors and styles.

